Getting Started
This page walks you through the steps you must take to start adding Vesta’s fraud detection to your app. These steps include creating an account, getting API keys, and setting up webhooks.
Create Account
Once you have determined whether you will use Payment Protect or Payment Guarantee, follow the steps below to create a Vesta account:
-
Go to the Vesta Console Registration page.
-
Fill in the form on that page. Select whether you will use Payment Protect or Payment Guarantee.
-
Click the submit button, then answer a few questions to help tailor you experience and finalize the sign up process.
An email will be sent to your registered email address with a temporary password and link to sign into the Vesta Console. Don’t forget to check your junk folder since we’re just getting to know each other.
-
Click the link in the email and log in using your temporary password. The Console Dashboard will be displayed:
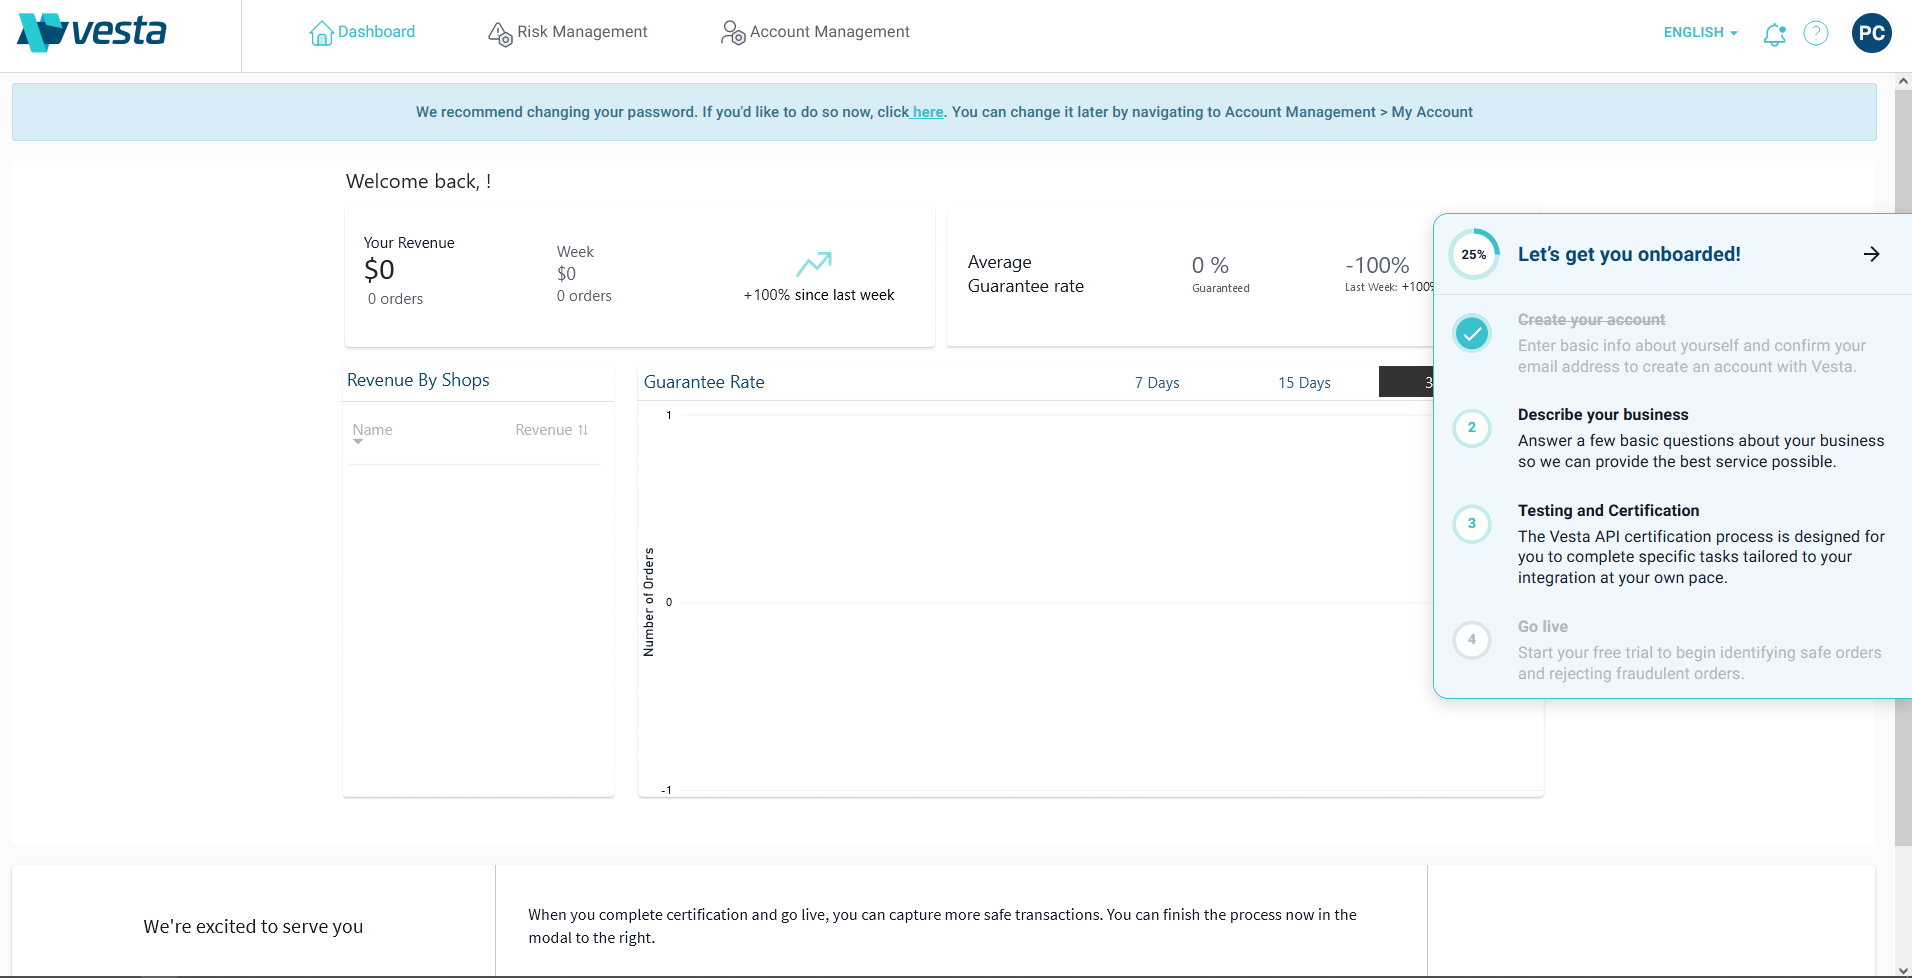
-
Click the link in the blue box at the top of the page to change your password.
Get API Keys
Work through the Describe your Business section of the “Let’s get you onboarded!” panel. Once you have completed the Describe your Business steps, you can begin the Testing and Certification steps:
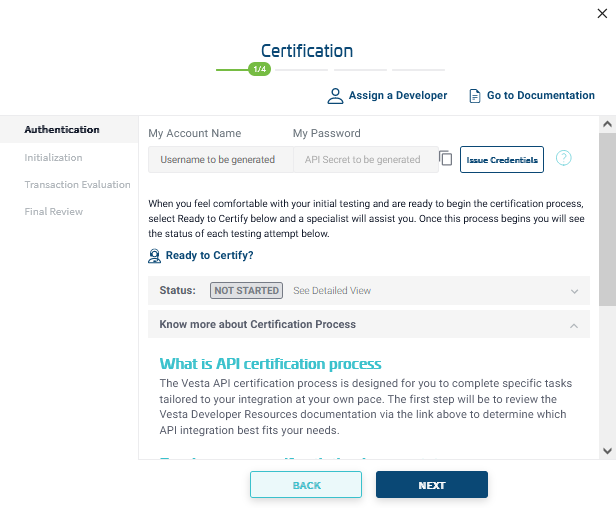
Click the Issue Credentials button. The values in My Account Name and My Password field will be filled in with your API sandbox credentials.
Click the copy icon to copy your password to your clipboard, then save it somewhere secure.
Warning: If you lose or forget the password, it must be changed and your application will have to be updated.
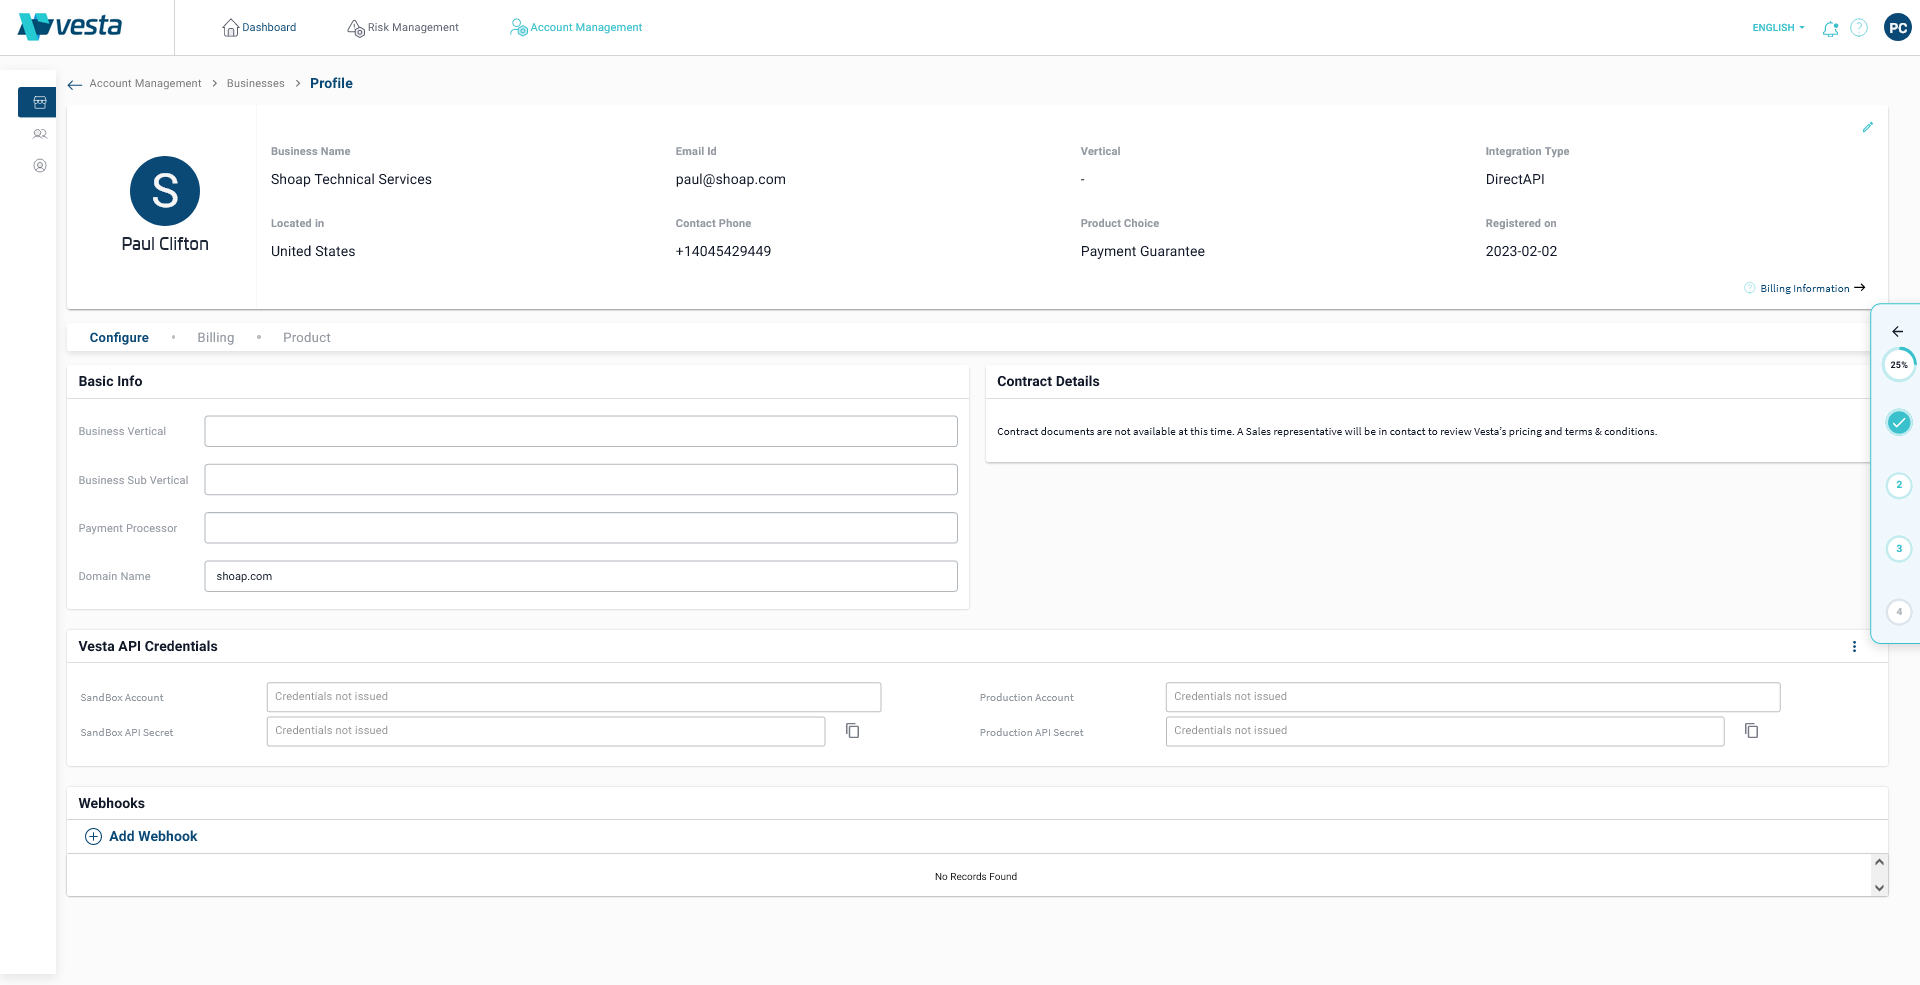
When you close out of the Onboarding panel, you can access your credentials in the Vesta API Credentials panel on the Business Profile page. To access the Business Profile page, select Account Management from the top navigation, then select Businesses from the left hand navigation, as shown below.

Next, click the arrow on the right side of the business information in the table. The Business Profile screen will open:
Set Up Webhooks
Navigate to your Business Profile by selecting Businesses from the left hand navigation, then click the arrow on the right of the row corresponding to the business that you will be integrating:
The Business Profile screen opens and the webhooks panel will be available near the bottom of the page:
Click the Add Webhook button to open the webhook panel:
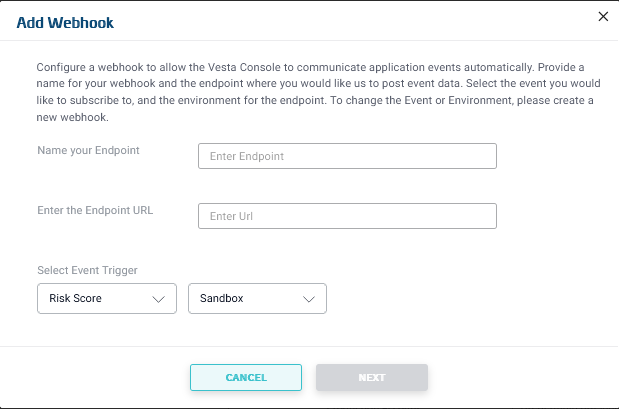
Fill in the information about your webhook. The Endpoint URL defines where Vesta will post information when a transaction event occurs. The Event Trigger defines which event will trigger the notification.
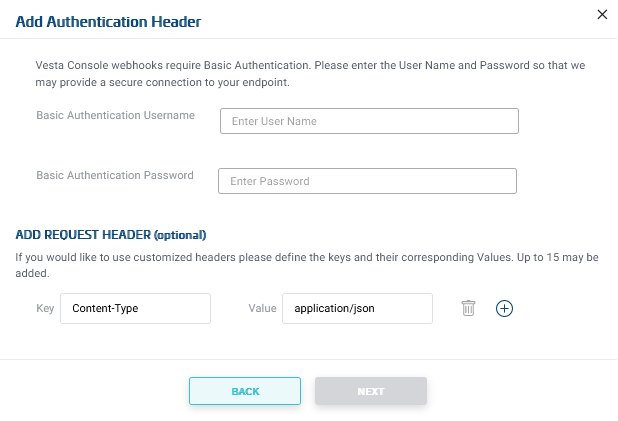
Click Next. The panel will prompt you to add webhook authentication details. Vesta will use the details that you provide on this page to build the authorization header of the post request that we send to your webhook endpoint. You can also set custom headers to drive you application logic:
Vesta will send a test request to your webhook URL with the information you provided. You will be notified of the results of the request. If the request is successful, click the Add Webhook button to complete the process. If the request fails, click the Back button to edit your settings and retry the request.